
Y'all.
Apparently it takes me 3 weeks to remodel a kitchen and 10 months to post about it. I'm SO sorry! I posted our reveal here and part 1 here...and I'm FINALLY following up with part 2. I promise we didn't live in our kitchen with untreated countertops for the last 9 months.

I ended part one showing you how we prepped the kitchen and chose our stain color.


I stained over about a week. I sanded each top (in the garage), wiped the counters down with a tack cloth, and applied a coat of stain. I let the stain sit for about 5 minutes before wiping off the excess. Only one coat of stain needed for the color we were going for!

After staining and waiting a couple days, I sanded with fine grit paper and used the tack cloth again to get the surface smooth. Then I used Waterlox and applied my first coat. Y'all, this stuff is way harder to work with than I thought it would be. There weren't clear instructions on how much to put on, so I put a too-heavy coat and it ended up beading up and gathering in certain places. It kind of dries like a gel so it beaded up on the bottom lip. It was a little disappointing, but supposedly this is the best sealant in the industry. So, those were my complaints but overall it did the job! I sealed each counter top 3 times and allowed it to dry about 18 hours (at least) in between.
While the counter tops were drying, we prepped for the back splash. We bought this backer board (wonderboard was the brand) and cut it with an eXacto knife to fit. The previous owners hadn't used backer board for their (crappy) tile job, so we had to install this. This is just a quality step plus it provides a nice level space to apply the tile.

Soon enough, we brought in the counter tops!!! They fit perfectly. Mark and his dad did a little jimmying with some random small pieces of wood to get it level. We didn't secure the counters at all. They are super heavy and haven't moved! Plus, the tile is caulked to meet the counters so there is a bit of a connection there, if they were ever tempted to scooch.

Once we got the first counter mounted, we got to work on the other side and attached the sink.

After a lot of discussion, we decided to go with a single sink (as opposed to a double) because since we have a dishwasher, we typically only wash big pots and pans in the sink, thus making one large tub better than two smaller tubs. Be sure to measure your existing cabinet opening and plumbing before you decide on the size sink that you want!
We ordered this one from Overstock (we had a gift card) for around $90 and it came with all of the connectors. We used our existing plumbing and just attached our old drain/disposer to the new sink.
I made sure to use the Waterlox on the bottom of this counter top, and you can see the difference of between the raw and sealed wood in these pictures. We actually really liked the colors that came out with just sealing and no stain, and I had a moment of regret with the stain...but what is done is done and we still love our counters.

We made sure to measure, adjust, measure, adjust a ton of times before we drilled our holes. Basically, we marked the sink outline on the underside of the counter and then applied a thin line of silicone before we set the sink down. The silicone isn't actually holding the sink, but it creates a watertight barrier. Then we fastened these clips to do the bulk of the heavy holding. After letting that sit for about 24 hours, we turned the counter over and applied another bead of silicone caulk in the gap (where you can see it) and smudged it in with our fingers. This was just another watertight step.
We recycled our existing faucet and just went ahead and used it here. It was in perfectly good shape!


We did a test fit before drilling to see where we wanted the faucet to go. Unfortunately our cabinet modules aren't centered on the window so I had to make the tough decision of which to center the sink to : cabinets or window? I don't know that there was a right answer, so I chose the cabinets and it hasn't really bothered me.

After covering the counters in some brown craft paper, we got to work on tiling! We picked just plain white subway tiles from Home Depot for our back splash. We both like the look and they are super classic (and super cheap at $0.22 per tile) so we were happy! We started at the end wall (where we didn't apply backer board) because I wanted the tile to be centered on this end wall. It took a while to find our groove but Mark would apply the mastic and I would place the tiles, checking whether they were level as I went. We used 1/8" spacers and once we had a few rows going, we got into a good rhythm.


Mark and I ended up having separate work trips to Las Vegas during our tile job, so not only did we get to hang out together for about 18 hours in Vegas, but I came home while he stayed for a couple more days and I finished the tile job! It took about 2 nights of placing the tile and then 2 nights of grouting to finish the job.

This is a bit out of order, but during the reno, Mark installed this light that I found on Etsy. I love it! It was super affordable and just the simplest little kitchen light, which I was looking for!
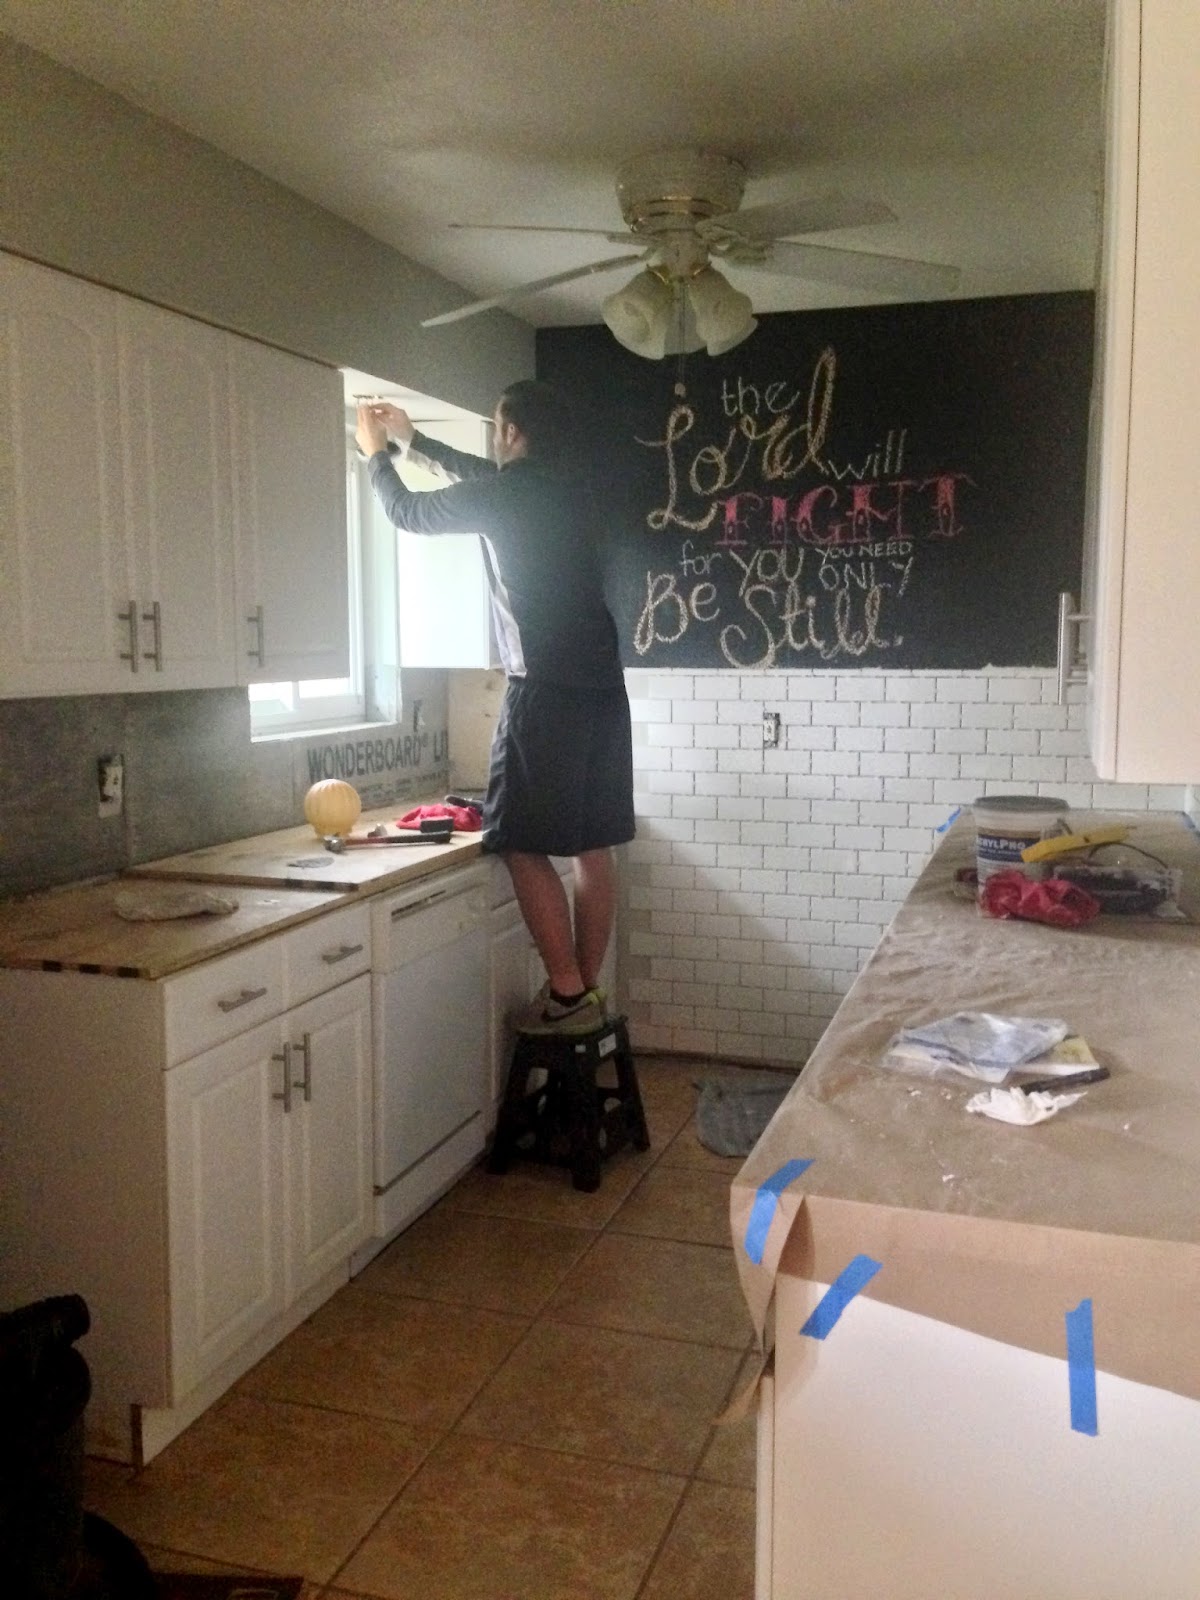

I spent some late nights of grouting here!


I took this picture and sent it to Mark as he was gallivanting around Las Vegas...we went with a white grout, but I've seen some AWESOME kitchens and bathrooms with dark grout and white subway tile.

One side of the paper is up!


We went back and caulked the top line of that tile, don't worry! ;)

I wrote longggg ago about how I wanted to do something like this, but I couldn't bring myself to do it, afraid I would have a permanent reminder of my bad decision. I compromised and painted this area around the window instead. I hardly notice it from day to day but it definitely makes a difference!


The demo and remodel took us a total of about 2.5 weeks, and while it wasn't necessarily hard, it was much more time consuming than I thought it would be. But after a light update, new dishwasher, adding the trim, multiple holidays and reasons to decorate, this is what it looks like today (without the Halloween decor, but you get my drift!):


In less than 2 weeks (almost a year to the day that we demo'd all of the tile in there), the floors will be ripped out in preparation of our next DIY: laminate flooring! I'll be back with all of the details of that soon!
In the beginning, I fully intended to keep a tally of exactly how much everything cost so I can share it with you all, but I'm a horrible blogger and not only did 10 months fly by, but it turns out I'm not so good at keeping a record of all of that. I have a pretty good idea of what it cost, though, and I think it was around $1200. If you want me to dig deeper into my records, please email me with any questions and I'm happy to share more details!
My thoughts - DIY is MUCH harder than it seems. I like doing it and I'm still not afraid to tackle projects, but I'm not very detail-oriented and I'm a rusher. I'm proud of what we did, but I can see my errors all over the place! We're definitely amateurs but I think we'll keep doing this and practicing our skills as it's usually the most cost-effective way to go. We also wish we wouldn't have stained the counters and just done the Waterlox instead. There's a small chance that we may sand these puppies down (in place) and re-seal them. I need to do a little research on that...
...but for the last year, we have realllllllly loved our little low-budget kitchen reno. I am much happier with it than the mess of tile we had before and I'm reminded daily of our hard work and ambition.
Please email me if you have any additional questions!


